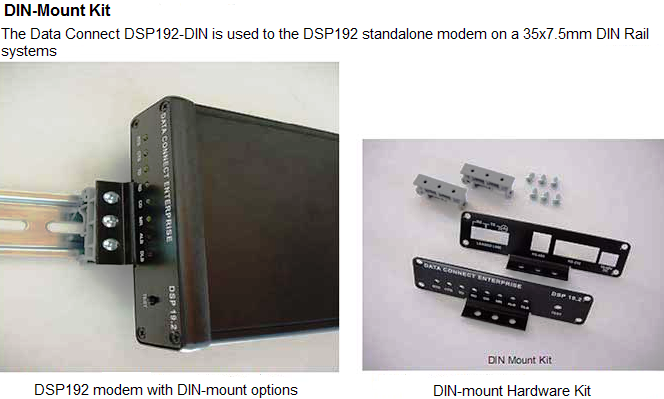
The Data Connect DSP192-DIN
Installation
The installation instructs provide below are intended for the installation of the field upgrade kits DSP192-DIN (for DIN rail mounting). If your modems already come with the front and rear “L-Shape” brackets attached, please skip the first 3 steps for replacing the panels and go directly to install the modem on the DIN rails.
Installing the DIN Rail mounting kit:
- Place the DSP192 modem on a desk or table top with the bottom faced upward
- Remove the rear panel by removing the 4 screws and replace it with “L-Shape” rear panel mounting bracket onto the end of the modem by aligning with the connectors of the modem board
- Remove the front panel by removing the 4 screws and replace it with the “L-Shape” front panel mounting bracket onto the end of the modem, by aligning with LEDs and switch
- Attached the two (20) DIN Mount Bracket onto the front and rear panel with the six (6) provided screws
- Install the modem onto the DIN rail bracket by pushing the clips firmly to latch onto the DIN rail


